
How to generate NSFW in ComfyUI on RunPod (workflows inside)
This guide walks you through setting up ComfyUI on a high-performance RTX 5090 pod inside RunPod, using DarkBlitZ6 BeyondNSFW + Lenovo UltraReal LoRA, and preparing everything for workflow use.


1. Sign In/Sign Up on RunPod
- Go to: https://runpod.io
- If you have a Google account, you may see a “Claim Bonus” popup when visiting the site.

Steps:
- Click Claim Bonus
- You’ll be redirected to the sign-up page
- Sign up using Google to receive the bonus credit
You can also register normally (without bonus credit)
Once registered, log in to your dashboard.
2. Add Funds to Your Account
After logging in:
- Open Billing
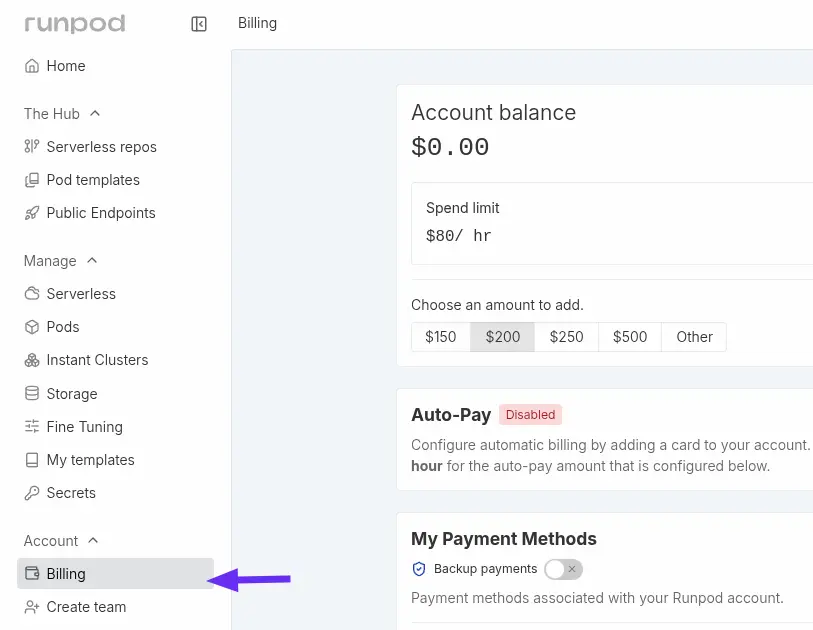
- Click Top Up Balance
- Minimum deposit: $10
- Payment options: Card or Crypto
Your balance will be used to pay for GPU usage time.
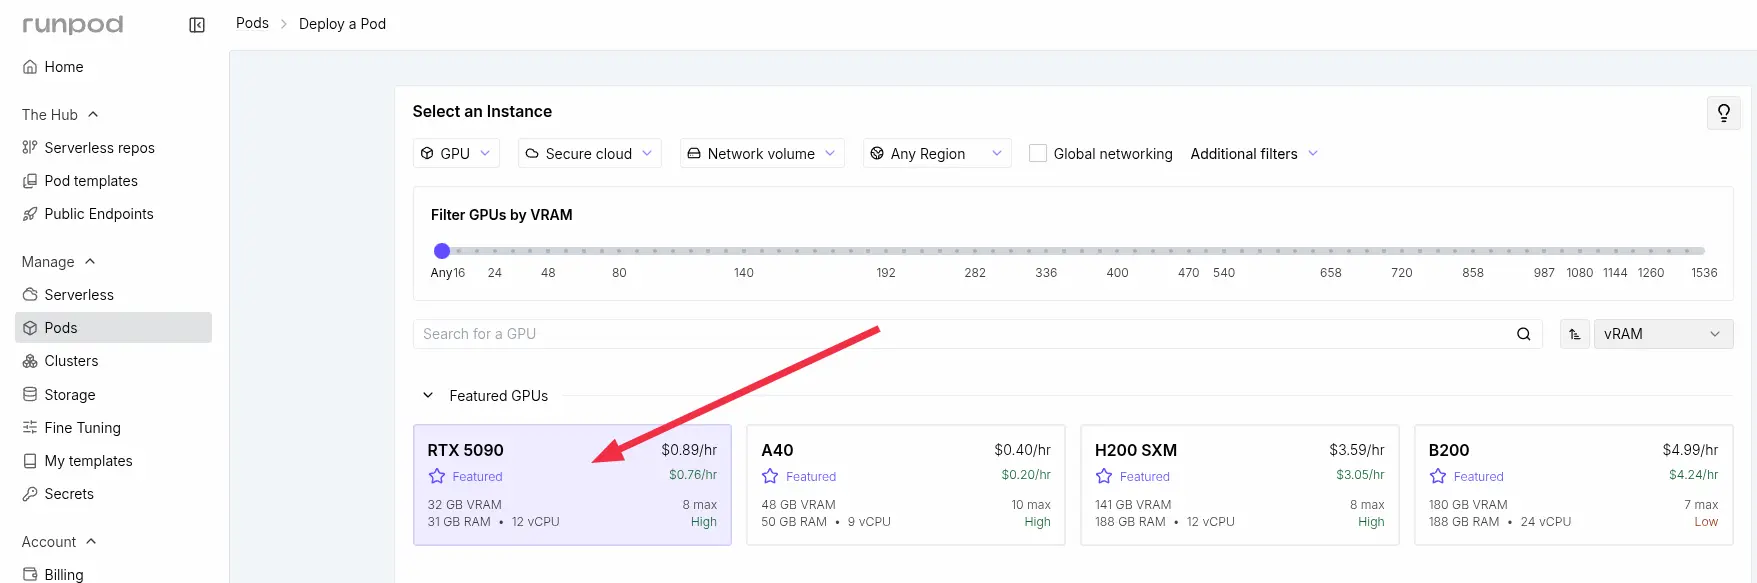
3. Create a New Pod (RTX 5090)
In the left sidebar:
- Go to Pods
- Click Create Pod
GPU Selection (Important)
For this tutorial, select:
RTX 5090
(This provides strong performance for z-image based models and LoRA usage.)
4. Choose the ComfyUI Template
- Scroll down to Templates and click Change Template

- In the modal search for: ComfyUI
- And select: ComfyUI – Blackwell Edition (5090 / B200)
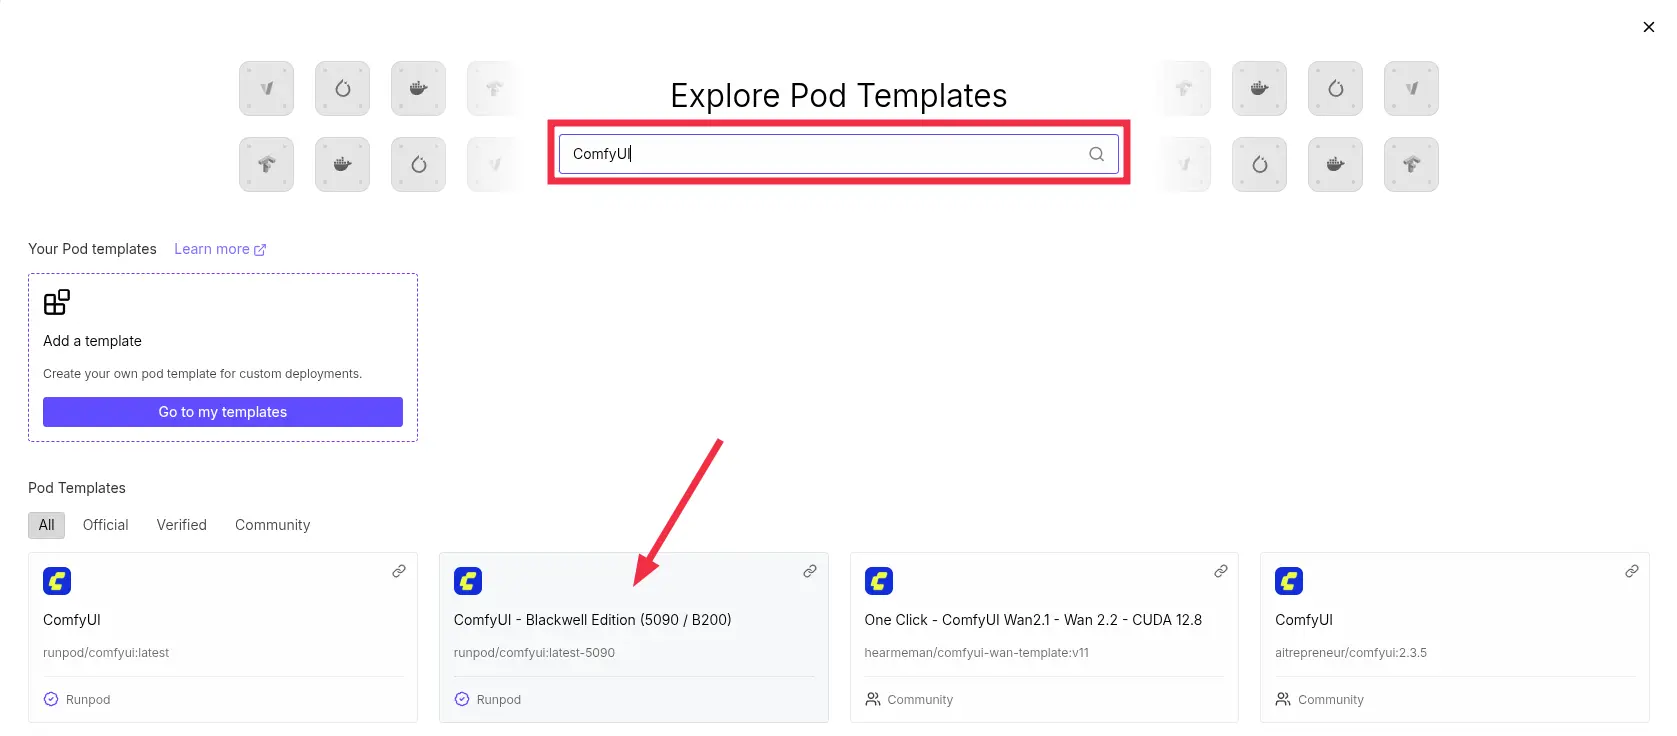
This template is optimized for 5090 hardware.
5. Edit Template Settings (Important)
- Click Edit
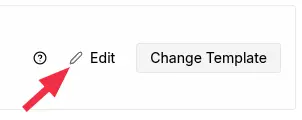
then adjust:
- Container Disk: 60 GB
- Volume Disk: 60 GB
- Then click Set Overrides

6. Deploy the Pod
After configuration:
Click Deploy On-Demand
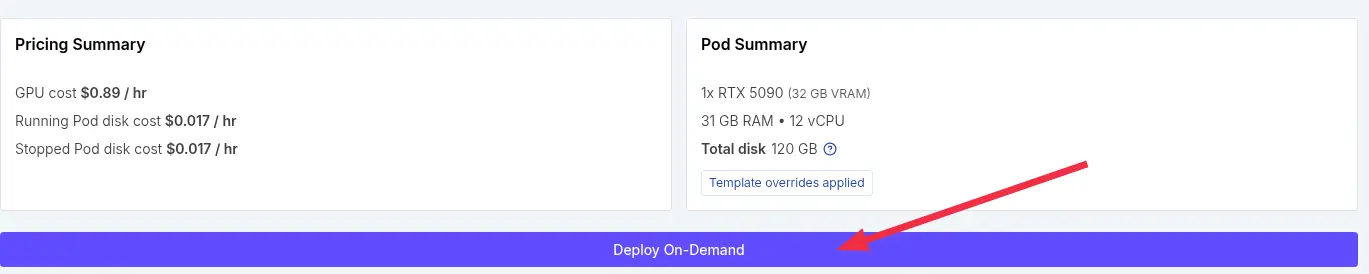
Your pod will begin provisioning.
You can monitor progress in Logs:
- CUDA setup
- ComfyUI installation
Wait until the pod status shows:
Running
SSH Setup (Windows / Mac / Linux)
Next, you’ll connect to your pod using SSH.
Step 1: Generate an SSH Key (If You Don’t Have One)
Windows (PowerShell):
ssh-keygen -t ed25519
macOS / Linux (Terminal):
ssh-keygen -t ed25519
Press Enter to accept default file location.
Your key will be stored here:
~/.ssh/id_ed25519
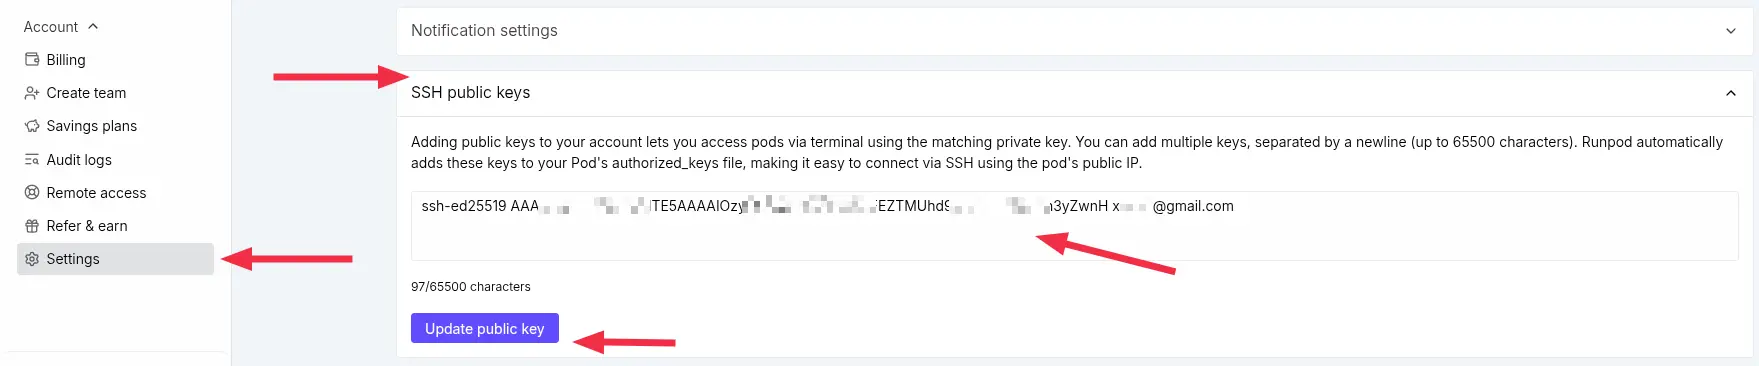
Step 2: Add SSH Key to RunPod
Inside your RunPod dashboard:
- Go to Settings
- Open SSH Keys
- Paste your public key (id_ed25519.pub)
- Save changes.
Step 3: Connect to Your Pod
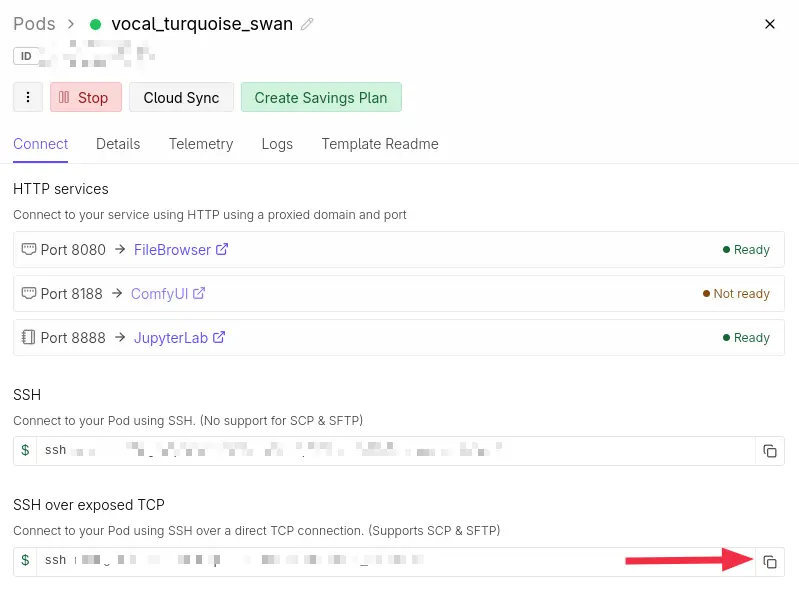
In Pod Connect tab copy this command:
ssh root@xxx.xx.x.xxx -p xxxxx -i ~/.ssh/id_ed25519
And run it in your terminal/PowerShell
Accept fingerprint by typing out yes and put your password if you have any (you set it when you created SSH keys at previous step).
If successful, you’ll be inside the pod terminal.
Create the Installation Script
Run the following command:
nano script.sh
Paste the following:
#!/bin/bash set -e # stop on first error COMFYUI_MODELS="/workspace/runpod-slim/ComfyUI/models" export CIVITAI_TOKEN="PASTE_YOUR_TOKEN_HERE" # Install civitai downloader curl -L https://raw.githubusercontent.com/ashleykleynhans/civitai-downloader/main/download.py \ -o /usr/local/bin/download-model chmod +x /usr/local/bin/download-model hash -r # Download LoRA download-model 2452071 "${COMFYUI_MODELS}/loras" # Download VAE wget -O "${COMFYUI_MODELS}/vae/ae.safetensors" \ https://huggingface.co/Comfy-Org/z_image_turbo/resolve/main/split_files/vae/ae.safetensors # Download text encoders wget -O "${COMFYUI_MODELS}/text_encoders/qwen_3_4b.safetensors" \ https://huggingface.co/Comfy-Org/z_image_turbo/resolve/main/split_files/text_encoders/qwen_3_4b.safetensors # Download base model curl -L \ -o "${COMFYUI_MODELS}/unet/model.safetensors" \ "https://civitai.com/api/download/models/2699886?type=Model&format=SafeTensor&size=pruned&fp=bf16&token=${CIVITAI_TOKEN}"typescript
🔐 Important: Use Your Own CivitAI Token
You must generate your personal API key from CivitAI.
- Go to: https://civitai.com/user/account
- Scroll down to API Keys
- Click Add API Key
- Copy the key
Replace PASTE_YOUR_TOKEN_HERE in the script
Save and Run the Script
Inside nano:
Press CTRL + O and hit Enter to save the file.
Press CTRL + X to close nano.
Run the following to make it executable:
chmod +x script.sh
And run the script:
./script.sh

Wait until downloads complete.
All models should now be installed in the correct directories.
Open ComfyUI
Back in RunPod:
- Go to your Pod
- Click Connect
- Click ComfyUI
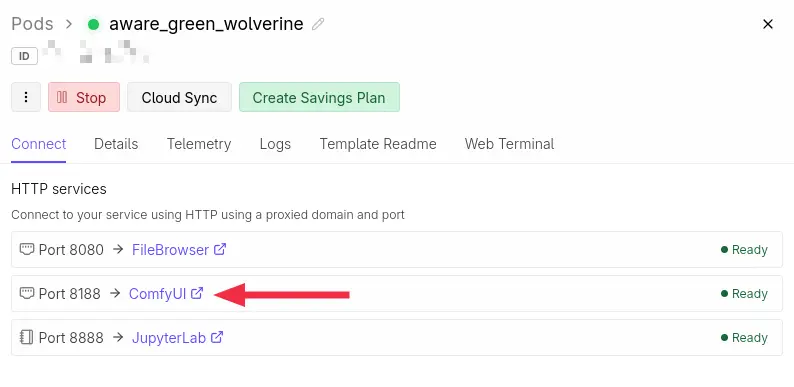
This will open the web interface.
Import the Workflow
You can download one of these generated images that contains workflow metadata.


In ComfyUI:
Drag and drop the image into the interface
It may say Missing Nodes
Install Missing Nodes
- Click Manager
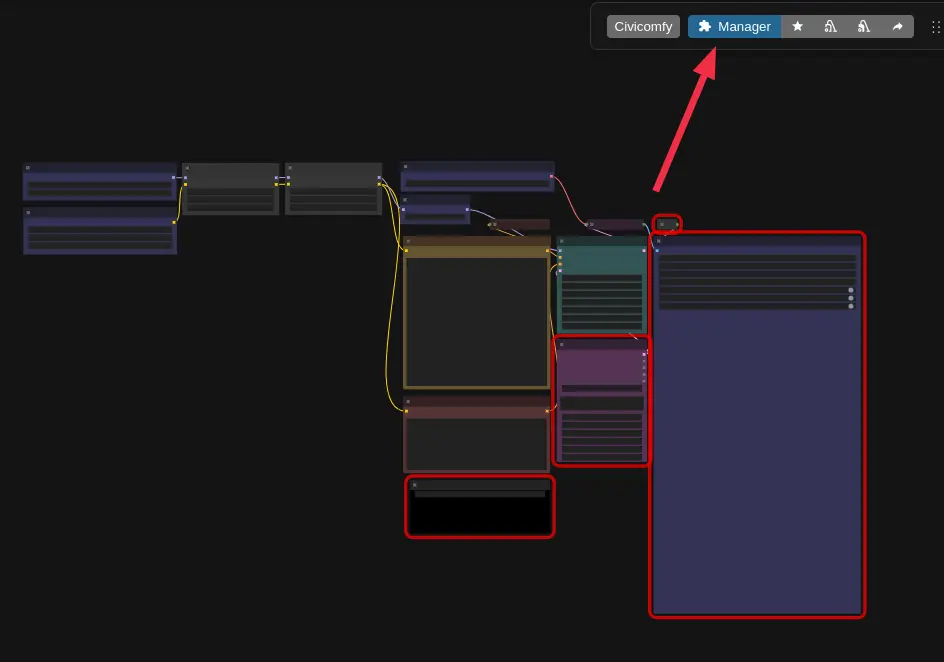
- Select Install Missing Nodes
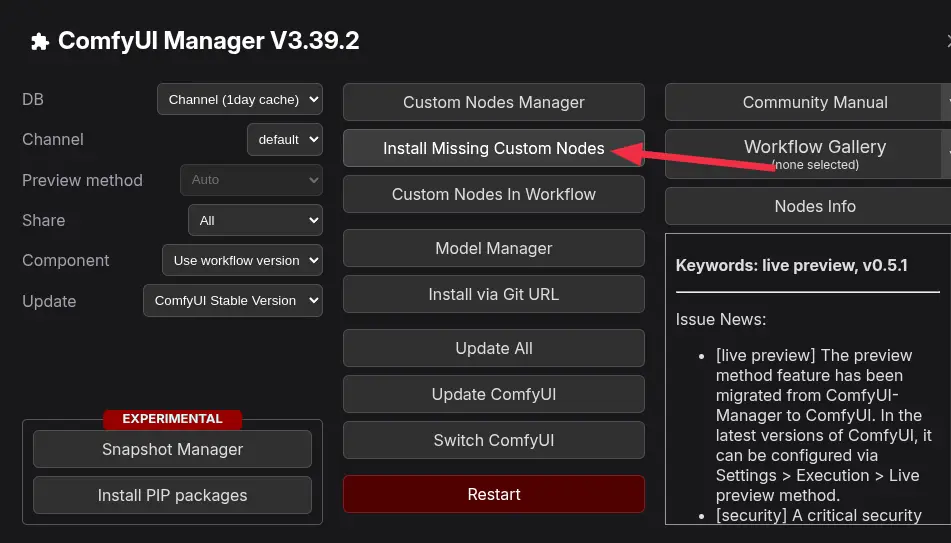
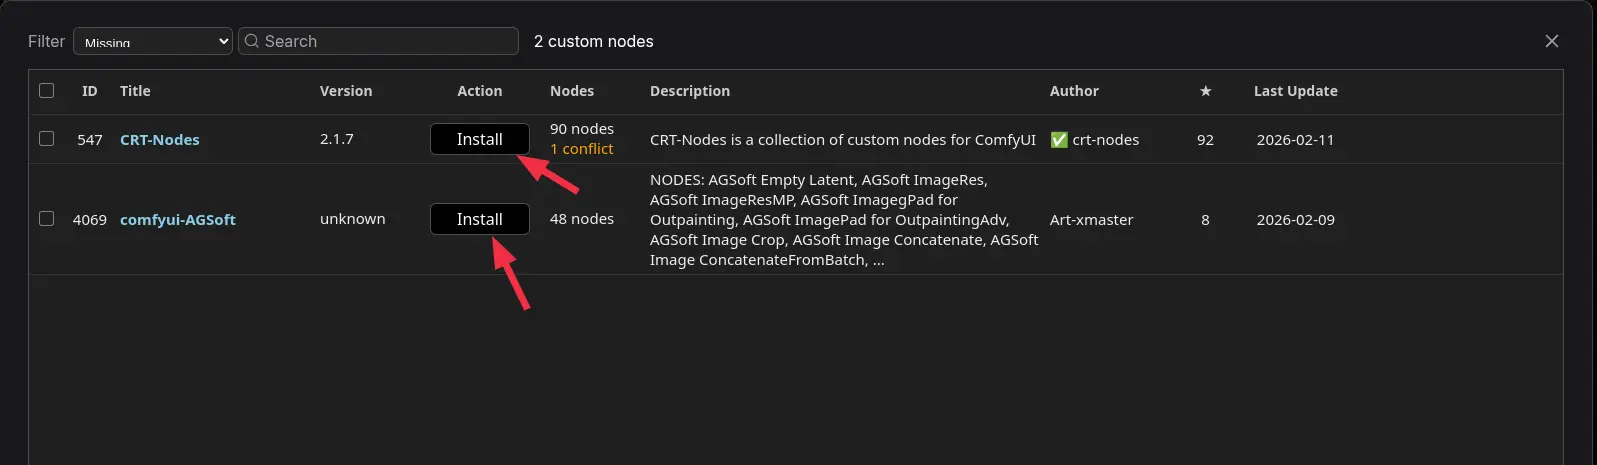
If prompted, select the latest versions
After installation:
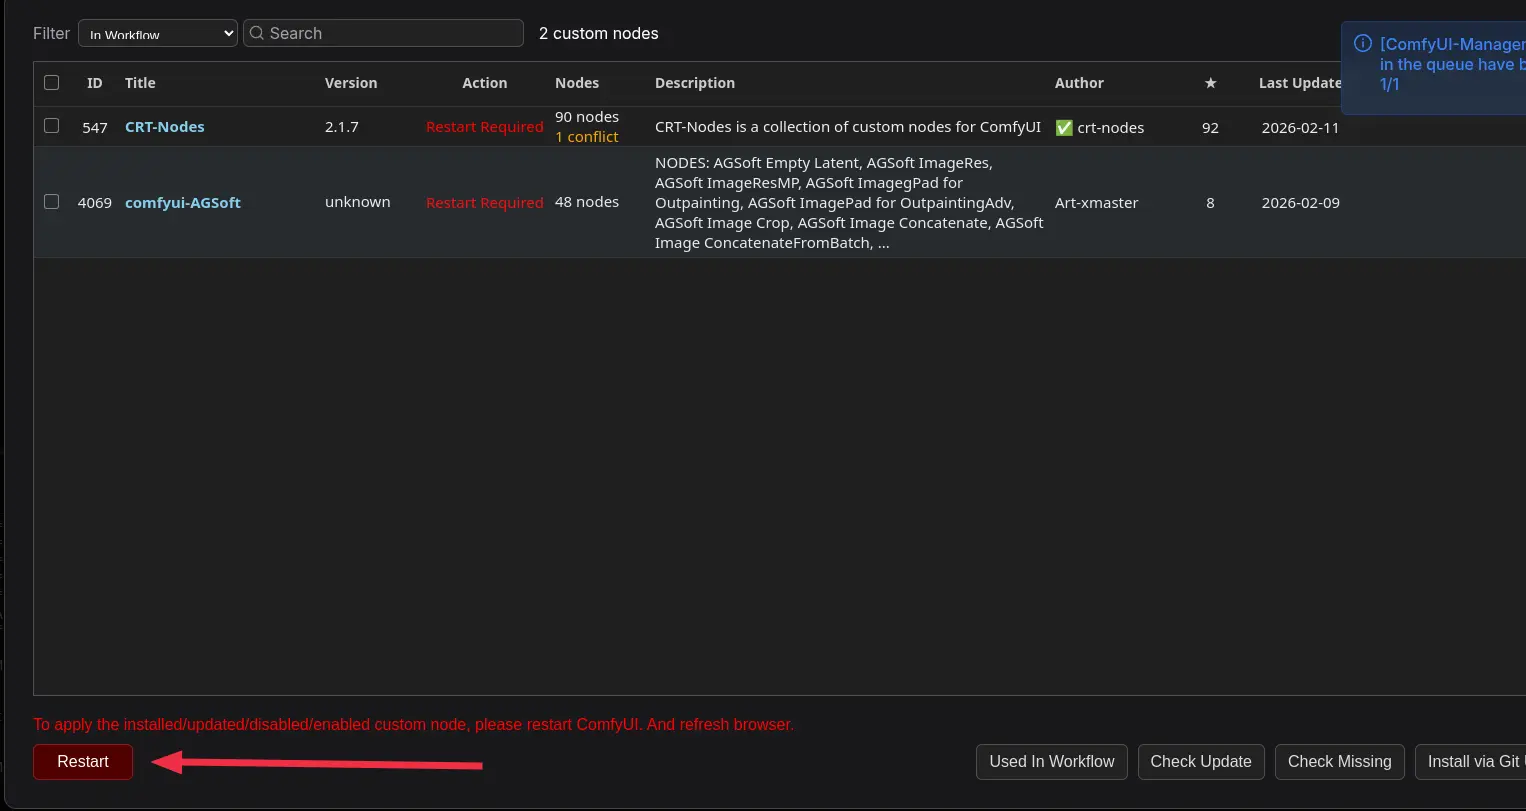
- Click the red Restart button
- Wait for ComfyUI to restart
- Refresh the page
The workflow should now load correctly.
Running the Workflow
Click Run
It will reproduce the same image because the seed is fixed.
Running again with a new seed will generate a variation based on the same prompt structure.
Experimenting with prompt
Start simple with core elements: l3n0v0 trigger first, then subject basics like "hot latina goth female, topless indoor. Run the workflow—note what generates cleanly (realistic skin pores, amateur flash, 2000s candid vibe).
Layer Details Gradually
Add one concept per test: lighting ("window natural light"), pose ("sitting couch top view"), action ("masturbating seductively"). Re-run with fixed seed for consistency, then vary seed for alternatives.
Avoid Long Prompts Initially
Jump to full scenes (blowjob OOF cock, anal spread, doggystyle ass up) only after basics work. Long comma-tag lists confuse models—hallucinates extra limbs or wrong ethnicity. Build like:
Test 1: l3n0v0, nude goth latina, bedroom window light
Test 2: + masturbating fingers pussy, eye contact
Test 3: + OOF penis nearby, seductive lips parted
Test Male Implication
For POV acts, use "male standing out of frame, penis outline pants, hand on penis" before full exposure. Ensures subtle hints without model freaking on anatomy.
Comments